Showing posts with label stain. Show all posts

Tuesday, May 6, 2014

DIY wood stain; steel wool and vinegar solution

This wood stain took several attempts before I got it right. I first tried a tea stain but that did not work out well. 

This is the tea stain that I attempted three times (fail!)


This is the second  attempt at the steel wool. The first time I used a steel Brillo pad; it was not wool so it didn't work out (fail!) In this jar is a Brillo steel wool that already had the soap in it. I figured if I just washed out all of the soap it would work (fail!)


I found this one at Hobby Lobby and thought for sure that this one would work out because it says steel wool. WRONG! Epic fail, again. 

I did not want to go all the way to Lowes for this but had no choice. This is the one that many people use when I did my research. So I went out and got it. And it worked! FINALLY!  I only used one steel wool (the package comes with 12) and 8 oz. of white distilled vinegar. You need at least 24 hours before you can use it but I waited a week

When I was ready to stain my buffet table made from pallet boards, I added 8 oz. of water to the mixture. I simply used a rag to apply the stain. 


I used the same solution for several projects but found that after a couple of weeks the color is not as rich any more so I will be making another batch.

Wood stain, super cheap and easy!

Thanks for checking out my blog and please check back every Friday for a new post.
-And remember, anyone can DIY. You just have to be willing to give it a try!

Pallet board buffet table

I am really into grilling and like to eat outside. Now that I have an awesome patio set, I wanted to have more meals outside since the weather is warmer. When I have guests over, I sometimes like to serve the food buffet style; set out the food and let them grab what they want. I didn't want the table we eat at to be cluttered with plates and dishes while we are trying to eat. So I decided I would make a buffet table! I used the pallets that I had left over from my pallet board table top. 
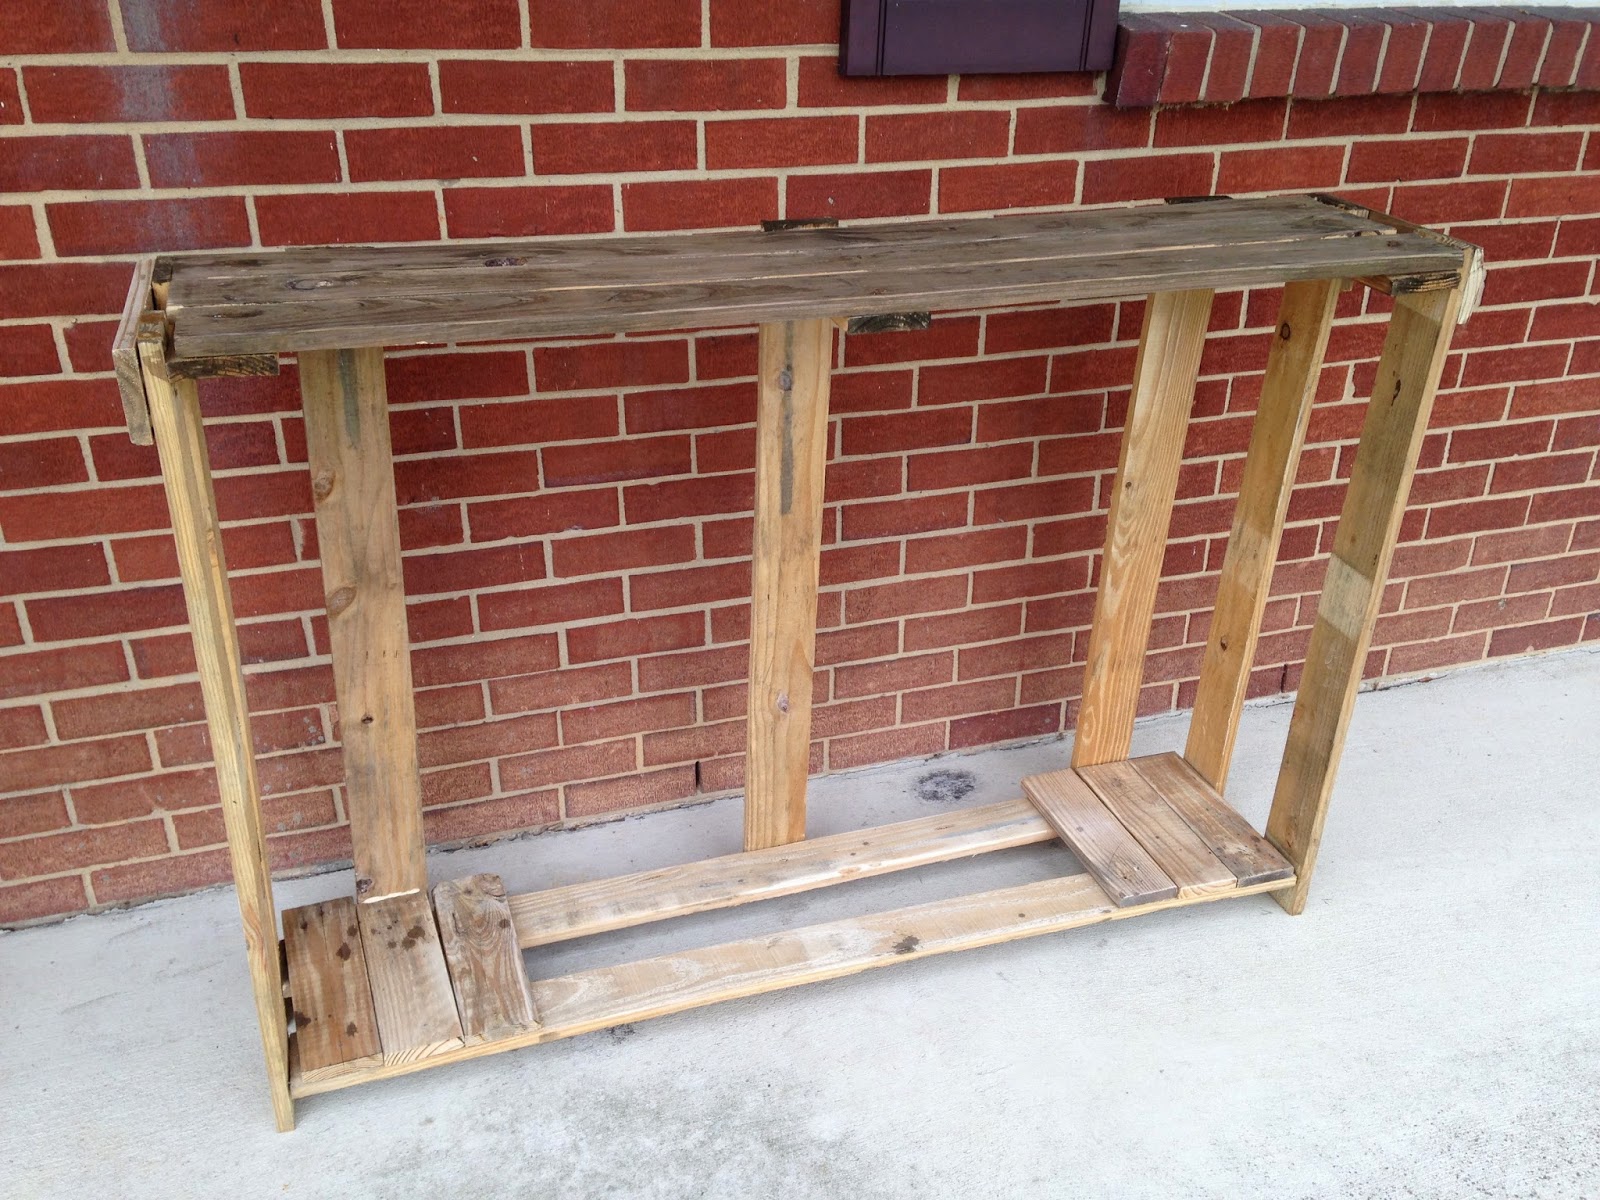
The top of the buffet table was already together. I just had to add one board in the center. After that
I attached the four legs. I did not want a wobbly table, so I added more support beams. I then added six pieces at the bottom to act as shelves. I did not fill up the entire bottom because I did not want to make the table heavier.
TIP: Whenever I nail pieces together I first use wood glue, then hammer and put something heavy on top while the glue sets. I do this to ensure that whatever I make will be sturdy.  

After I had the table assembled, I sanded it down with a 60 grit sand paper. I made my own stain with a steel wool and vinegar. I will create a post on how to do this  as well. I took a rag and applied the stain. 

If you are making something and know that you are going to stain, I recommend first staining the pieces and then assembling. This ensures that you get every nook and cranny. 

 The stain immediately reacted with the wood. It came out a gorgeous brown! After I was done staining I applied a spray poly.


I have my tin can lanterns at the top, and chic coasters at the bottom of my gorgeous buffet table adorned with my burlap banner!

Thanks for checking out my blog and please check back every Friday for a new post.
-And remember, anyone can DIY. You just have to be willing to give it a try!

Sunday, May 4, 2014

Pallet board table top


This is a table that one of my neighbors had on the curb to be thrown away along with six wicker chairs that were still in good condition. I wanted a patio set so I was determined to save it! It originally had a glass top that was broken in one corner. While my husband and I were loading it into my truck it came off (which worked out for us!)


The first thing I did was clean it up then paint it black with a high gloss paint.


Here my dad and I are measuring how long the support beams need to be. 


We took apart the pallet boards two ways. The first way was using my Dad's Dremel multitool. We also took a hammer and banged out some of the boards that were attached with staples not nails. The Dremel cut right through the staples and nails. I wanted to leave some of them in for "character".


After we took apart the pallets we laid the pieces that we wanted on top of the table. We put an X on the side of the boards that we were going to cut off. 

Taking measurements for the table top.

Support beams running horizontal.

After we made our cuts we used wood glues to secure the top boards to the support beams. We also needed the support beams so that the table top would be flush with the metal table.

I stenciled our last name "LUCKY" and the year we were married.


I then used a deck stain because it stains and seals it. I chose a redwood stain. I like this color because you can still see the detail in the wood. These are the chairs that I also saved. 

 Check out my post on how to make these lovely tin can lanterns!

Thanks for checking out my blog and please check back every Friday for a new post.
-And remember, anyone can DIY. You just have to be willing to give it a try!